Data Recovery Software for NTFS Screenshots
NTFS Data Restoring Software has the ability to recover your vanished files and folders from defective hard disks based on the NTFS file system. Application enables the user to retrieve their missing data back in several data loss incidents like boot sector errors, formatted NTFS partition tables, inaccessible disk volume, corrupted DBR, MBR and Master File Table (MFT), etc. NTFS Data Recovery Tool is an effective solution that produces quick and precise data recovery results. Software is easily compatible with Windows 11, Windows 10, Windows 8, Windows 7, Windows XP, and all other remaining versions.
Follow the below steps to restore your erased data from the damaged NTFS partitioned hard disk using the Data Recovery Application-
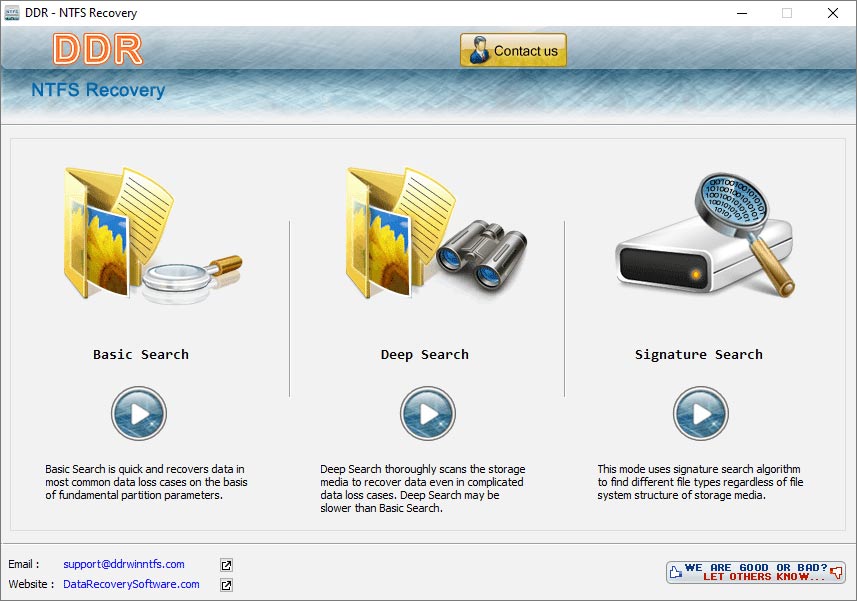
Step 1: Choose the type of search to restore your missing data
Firstly, you have to insert your damaged NTFS partitioned hard disk drive into your windows based system, and then launch the software. Select the "Basic Search", "Deep Search", or "Signature Search" Type to search the deleted data according to your requirement. In basic search, you can search the lost data in the whole corrupted hard disk storage quickly. In deep search, you can search the lost data in the particular sector range of hard disk drive. In signature search, you can search the lost data extension-wise.

Step 2: Select the defective disk partition and initiate the data recovery procedure
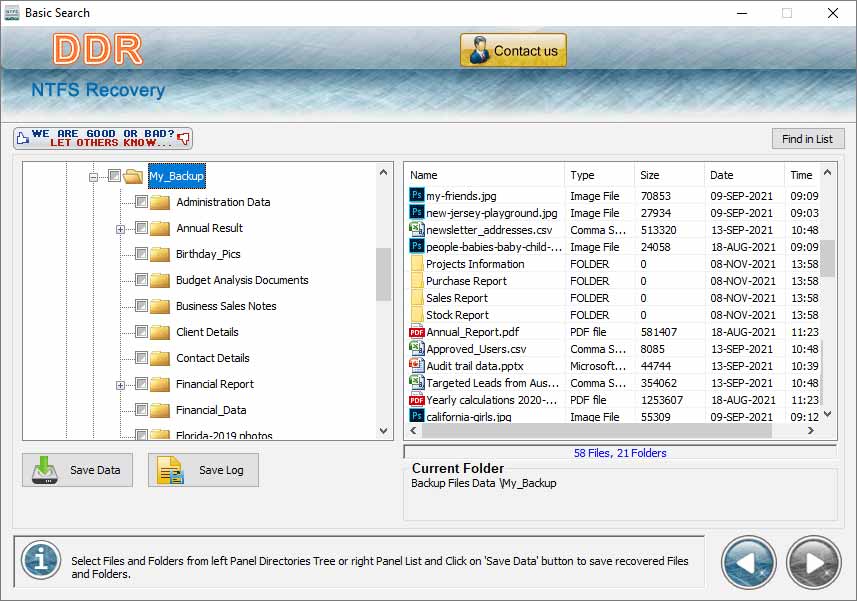
Suppose you select Basic Search, now the left panel shows you the list of available physical and logical drives. Select your defective NTFS hard disk partition from which you want to recover the data and you will see several details regarding the partition like partition type, partition number, start sector, end sector, disk number, etc. If you think any partition is missing, then click on "Search More Partitions" to view all the possible partitions of hard disk drive. Now, click "Next" to begin the file searching process and once the process is finished, all your lost files are recovered and displayed on the right panel. You can also see your recovered data in directories tree format on the left panel as shown in the below screenshot.

Step 3: Select the Save Data option to save the recovered data
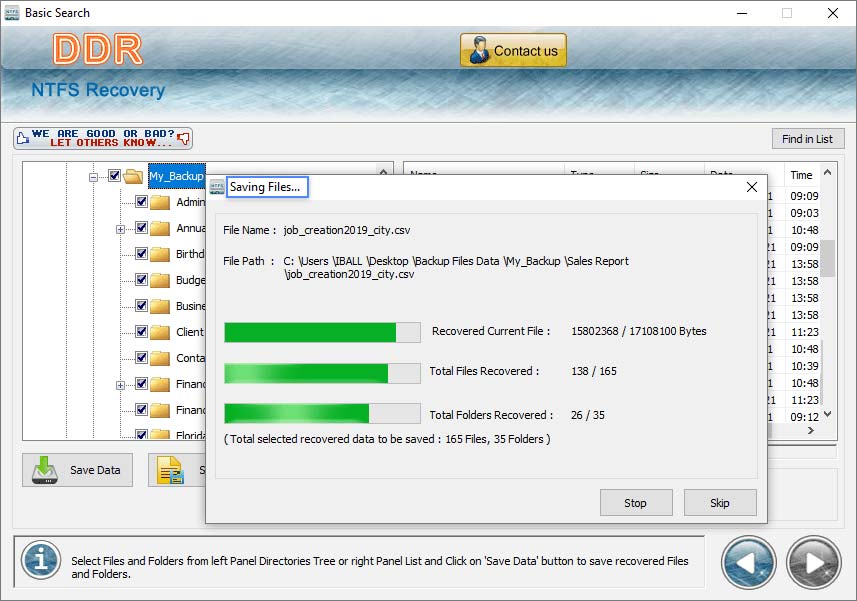
Select the folder directory from the left panel or the particular files and folders from the right panel list that you want to save. Now, click on the "Save Data" button and then browse the target location where you want to save your selected recovered data. But there is a recommendation that you should select a different drive location to save the recovered data, otherwise, selecting the same drive may cause overwriting problems and you will lose all your data permanently. Now, you can see the saving progress of your recovered data as shown in the below screenshot. Once all the recovered files are successfully saved, now select the "Open Containing Folder" checkbox and click on "Ok" button to view them.

 Download Now


